
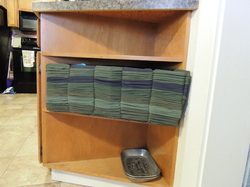
The project was a lot of fun and required minimal sewing (optional), helped me fill the triangular shelf in my kitchen that is IMPOSSIBLE to buy a basket for, and helped me clean some old t-shirts out of the closet!
What you will need
What you will need
- Cardboard box (I used an old diaper box)
- Scissors
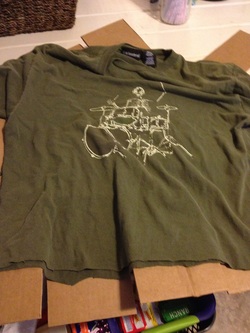
- Old t-shirts (I used 6)
- Needle and thread (optional)
- Packing tape (if you decide to make a triangle shaped basket instead of a square one

Step 1
If you are making a square basket, cut the sides into an even number of flaps.
If you want a triangular shaped basket, like mine, cut a box diagonally in half. Create a triangle base and a new side of flaps from the remaining half of the box. Use packing tape to secure. You still want an even number of flaps.
Step 2
Start cutting shirts. The easiest way to do this is to make horizontal cuts across the waist of the shirt at about 1 inch width. Continue making t-shirt rings until you reach the armpits of the shirt. (Save the remainder of the shirt for future portions.) I chose to not use the very base of the t-shirt because it did not roll as well as the rest of the material. Depending on the look you want, this is optional as well.
Step 3
Make sure your t-shirt rings are large enough to stretch fully around your box. If they do not reach, you will need to consider getting bigger t-shirts or a smaller box. You also have the option of cutting your rings into strips and stitching them together. In this case, it is possible to cut your box into an odd number of flaps instead of even and just continue weaving in a circular pattern around the box.
Step 4
This step is optional and depends on if you want any of your box visible through the woven t-shirts or not.
Use the remainder of a prior t-shirt to cover the base of your basket on both top and bottom. I cut two pieces from the chest area of t-shirts into triangles the same size as the base. I did some sewing at this point to keep the fabric flat and just stitched the two peices together at the very base of the slits between the flaps.
I then performed the other optional step of using the t-shirt sleeves to cover each flap. Again I sewed them down at the base to the triangular pieces I attached earlier, making sure to have a solid piece of fabric at what would be the top edge of the finished basket so no cardboard would be visible. At this point, the only cardboard visible was a slight amount between the edges of the flaps.
Step 5
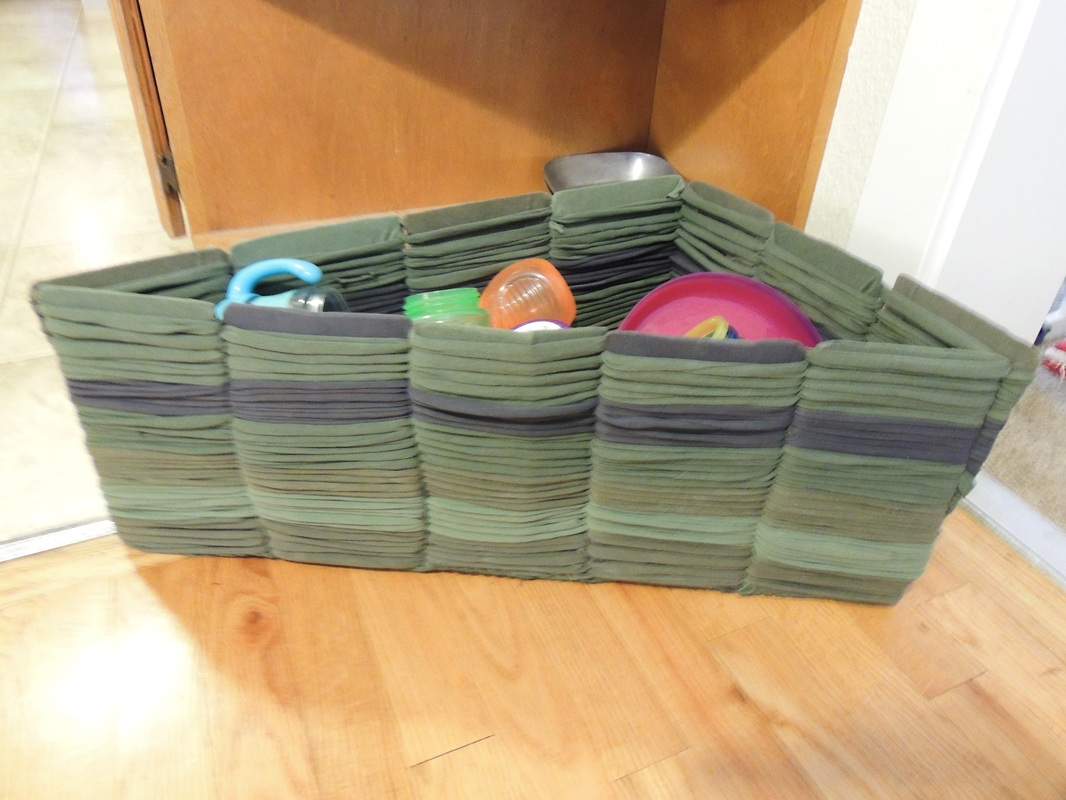
Weave on your t-shirt rings in an alternating fashion. The first t-shirt ring will go in front of your odd numbered flaps and behind the even numbered flaps. The second ring will go behind your odd numbered flaps and in front of the even numbered flaps. Continue for the length of the flaps. Make a pattern if you like or go completely random. The look you want is up to you! I used these green t-shirts because they matched closely to the color of my table cloth, but I think this basket would look GREAT in bright colors for a bedroom!
I hope you enjoy this project as much as I did!
This step is optional and depends on if you want any of your box visible through the woven t-shirts or not.
Use the remainder of a prior t-shirt to cover the base of your basket on both top and bottom. I cut two pieces from the chest area of t-shirts into triangles the same size as the base. I did some sewing at this point to keep the fabric flat and just stitched the two peices together at the very base of the slits between the flaps.
I then performed the other optional step of using the t-shirt sleeves to cover each flap. Again I sewed them down at the base to the triangular pieces I attached earlier, making sure to have a solid piece of fabric at what would be the top edge of the finished basket so no cardboard would be visible. At this point, the only cardboard visible was a slight amount between the edges of the flaps.
Step 5
Weave on your t-shirt rings in an alternating fashion. The first t-shirt ring will go in front of your odd numbered flaps and behind the even numbered flaps. The second ring will go behind your odd numbered flaps and in front of the even numbered flaps. Continue for the length of the flaps. Make a pattern if you like or go completely random. The look you want is up to you! I used these green t-shirts because they matched closely to the color of my table cloth, but I think this basket would look GREAT in bright colors for a bedroom!
I hope you enjoy this project as much as I did!
 RSS Feed