
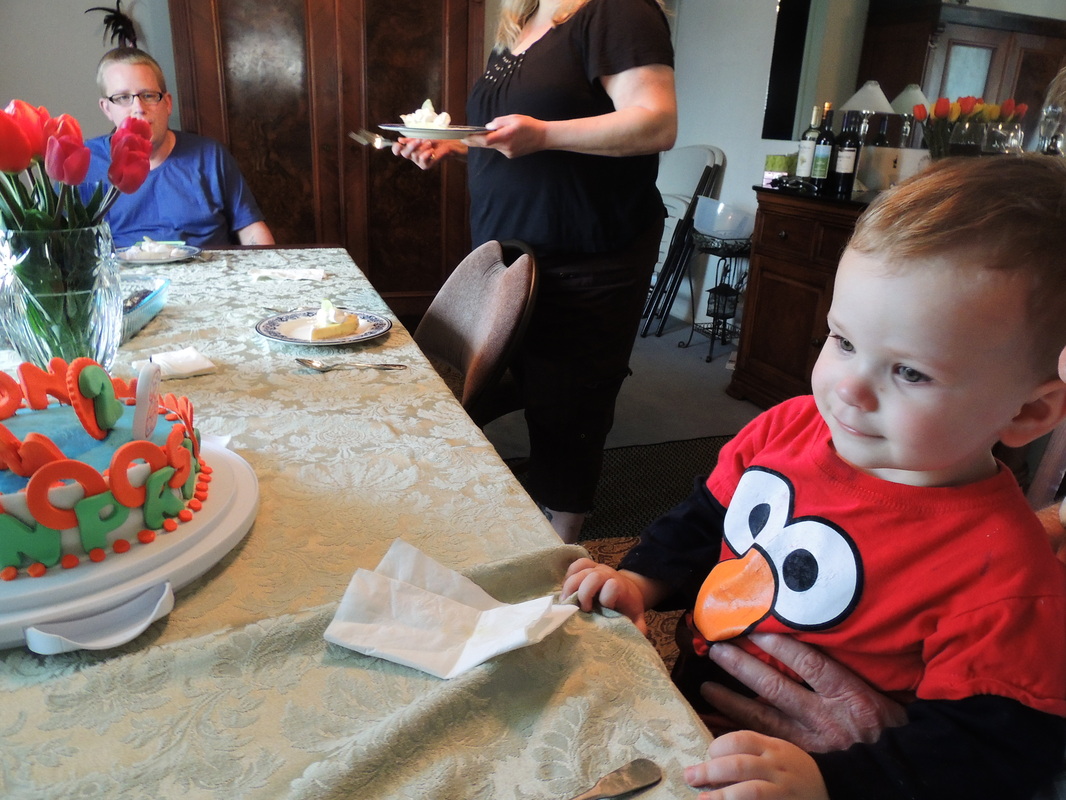
My son turned two years old on Monday, the day after Easter. We threw him a party for his first birthday, but with the holiday it just made more sense to bring the cake to our Easter gathering and do presents at home. Since I didn't spend time planning an entire birthday party this year, I knew I had to make a really awesome cake!
I figured between my creativity, Pinterest, and my love of all the cake shows on TV, that I could come up with something fun. I have always loved the way fondant looks, but have never been brave enough to try it. Every cake I came across on Pinterest that I really liked used it though. So I searched for how to make fondant and came across a great article about how to make it using Marshmallows and powdered sugar! [http://www.make-fabulous-cakes.com/rolled-fondant.html]
Once I decided that I was going to try working with fondant, I had to pick a theme for my son's cake. He loves vehicles (planes, trains, cars, bikes, etc), jumping, balls, letters and numbers the most. So, I found a cookie cutter set at Walmart for $10 that contained 101 cutters and knew I would be able to make fun cakes (and cookies) year after year using any of his other favorite things.
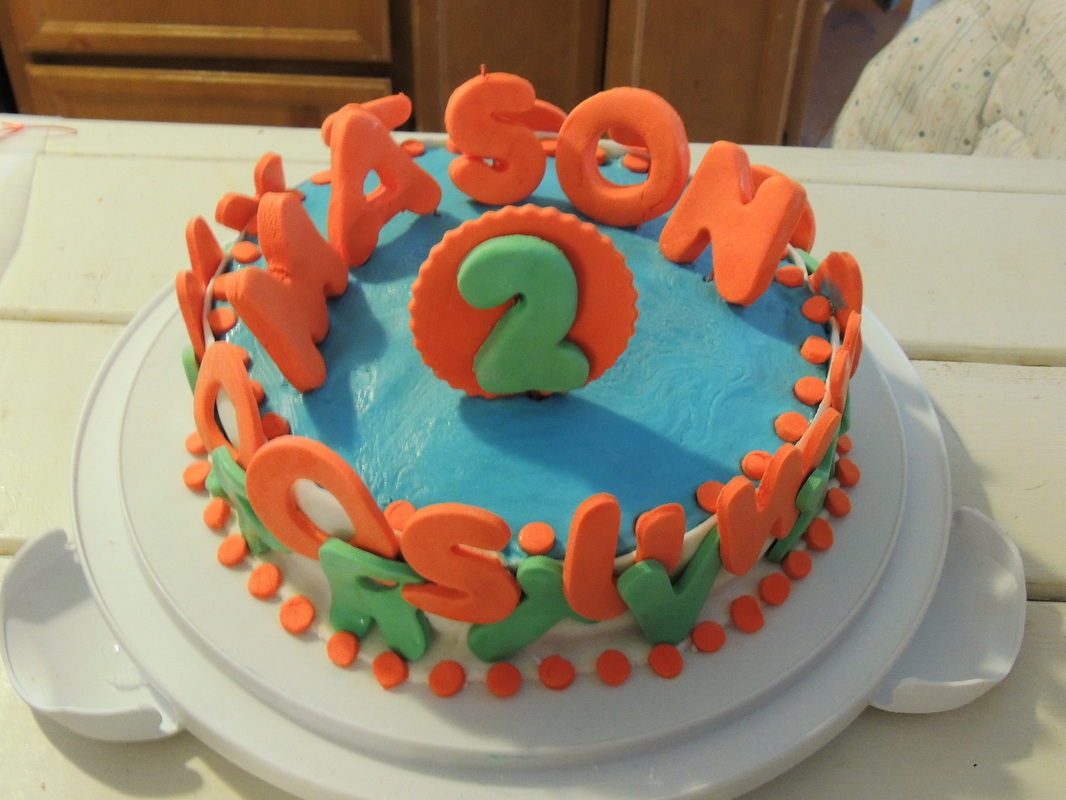
I ended up deciding that he really does love the alphabet the most, as his letter puzzle blocks are his FAVORITE toy, so I decided to go with that. I made a batch of fondant per the recipe and let it chill overnight.
The next day I decided I would make some of the fondant red. After adding large amounts of red food coloring and still having pink fondant, I decided that orange would look just fine and added a large amount of yellow to the batch. I rolled the fondant flat (about 1/8 inch) and cut out half of the letters. The fondant looked much lighter than the finished product immediately after rolling it in powdered sugar. I placed those letters on wax paper and then rolled the dough out again, only thicker this time. I wanted his name letters and number for the top of the cake to be thicker since I wanted them standing upright on the cake. Then I rolled the remaining orange fondant out one last time and used it for my polka dots. To make the dots, I cut a 1/4 inch piece off the end of a smoothie-style straw and used it like a cookie cutter. I also cut the cute little background for the number 2 out of this batch.
After I rested my arms from that, I did a batch of fondant in green and cut the other half of the letters thin as well as a thick batch for the number 2. Once again, I let the fondant sit overnight to set.
I wasn't brave enough to cover the entire cake in fondant because I wasn't sure if I'd be able to do it and have it look good, and also because I've heard a lot of people say they don't like the taste of it. I came to the conclusion that keeping it limited to the edges would be well received so that people would have the ability to scrape it off if they found it too sweet. That still left me with the question of how to cover the top of my cake so that it would look semi-consistent with the rest of it. Luckily, I had already read an article on Pinterest about how to make regular frosting look like fondant that would work perfectly! [http://sweetcsdesigns.com/the-easiest-way-to-frost-a-cake-ever/] My only complaint about this method was that, while the top looked great, the sides looked like a drippy non-smooth mess!
Since I just happened to still have a TON of fondant left over after making the letters and polka dots - one batch goes a LONG way people - I figured, why not make a nice white boarder around the edge of the cake to put the letters on?
I measured the height and circumference of the cake, rolled out a snake of white fondant, and created a long flat boarder that could be cut to the size rectangle I needed to make my cake border. I put on the white border and then wet the front & backs of my fondant letters (and polka dots) before putting them on. The water helped the letters stick to the border and also helped clear off any remaining powdered sugar that was still sitting on the letters. It also seemed to bring the color out more, which was great!
For the top of the cake, I used craft wire through the thick letters and number and inserted those into the cake. I had originally hoped to have the letters sticking up higher with some visible wire, but the weight of the fondant, and the height of my cake carrier made it necessary to have the letters closer to the cake.
All in all, I was very happy with my son's birthday cake and I know he liked it too!
Be sure to comment if you have any cake baking stories to share!
Shopping List for Alphabet Cake
1 package cake mix (plus add ins - oil, eggs, etc.)
1 container frosting
2 bag mini marshmallows (I could not find the bigger size bag they recommended in the article, so I used the digital scale to get the right grams)
2 bags powdered sugar (5-6 cups)
food coloring (unless you want white fondant)
Wilton's 101 cookie cutter set (sold on Amazon.com & at Walmart)
Bendable Wire, barbecue skewers or toothpics
I figured between my creativity, Pinterest, and my love of all the cake shows on TV, that I could come up with something fun. I have always loved the way fondant looks, but have never been brave enough to try it. Every cake I came across on Pinterest that I really liked used it though. So I searched for how to make fondant and came across a great article about how to make it using Marshmallows and powdered sugar! [http://www.make-fabulous-cakes.com/rolled-fondant.html]
Once I decided that I was going to try working with fondant, I had to pick a theme for my son's cake. He loves vehicles (planes, trains, cars, bikes, etc), jumping, balls, letters and numbers the most. So, I found a cookie cutter set at Walmart for $10 that contained 101 cutters and knew I would be able to make fun cakes (and cookies) year after year using any of his other favorite things.
I ended up deciding that he really does love the alphabet the most, as his letter puzzle blocks are his FAVORITE toy, so I decided to go with that. I made a batch of fondant per the recipe and let it chill overnight.
The next day I decided I would make some of the fondant red. After adding large amounts of red food coloring and still having pink fondant, I decided that orange would look just fine and added a large amount of yellow to the batch. I rolled the fondant flat (about 1/8 inch) and cut out half of the letters. The fondant looked much lighter than the finished product immediately after rolling it in powdered sugar. I placed those letters on wax paper and then rolled the dough out again, only thicker this time. I wanted his name letters and number for the top of the cake to be thicker since I wanted them standing upright on the cake. Then I rolled the remaining orange fondant out one last time and used it for my polka dots. To make the dots, I cut a 1/4 inch piece off the end of a smoothie-style straw and used it like a cookie cutter. I also cut the cute little background for the number 2 out of this batch.
After I rested my arms from that, I did a batch of fondant in green and cut the other half of the letters thin as well as a thick batch for the number 2. Once again, I let the fondant sit overnight to set.
I wasn't brave enough to cover the entire cake in fondant because I wasn't sure if I'd be able to do it and have it look good, and also because I've heard a lot of people say they don't like the taste of it. I came to the conclusion that keeping it limited to the edges would be well received so that people would have the ability to scrape it off if they found it too sweet. That still left me with the question of how to cover the top of my cake so that it would look semi-consistent with the rest of it. Luckily, I had already read an article on Pinterest about how to make regular frosting look like fondant that would work perfectly! [http://sweetcsdesigns.com/the-easiest-way-to-frost-a-cake-ever/] My only complaint about this method was that, while the top looked great, the sides looked like a drippy non-smooth mess!
Since I just happened to still have a TON of fondant left over after making the letters and polka dots - one batch goes a LONG way people - I figured, why not make a nice white boarder around the edge of the cake to put the letters on?
I measured the height and circumference of the cake, rolled out a snake of white fondant, and created a long flat boarder that could be cut to the size rectangle I needed to make my cake border. I put on the white border and then wet the front & backs of my fondant letters (and polka dots) before putting them on. The water helped the letters stick to the border and also helped clear off any remaining powdered sugar that was still sitting on the letters. It also seemed to bring the color out more, which was great!
For the top of the cake, I used craft wire through the thick letters and number and inserted those into the cake. I had originally hoped to have the letters sticking up higher with some visible wire, but the weight of the fondant, and the height of my cake carrier made it necessary to have the letters closer to the cake.
All in all, I was very happy with my son's birthday cake and I know he liked it too!
Be sure to comment if you have any cake baking stories to share!
Shopping List for Alphabet Cake
1 package cake mix (plus add ins - oil, eggs, etc.)
1 container frosting
2 bag mini marshmallows (I could not find the bigger size bag they recommended in the article, so I used the digital scale to get the right grams)
2 bags powdered sugar (5-6 cups)
food coloring (unless you want white fondant)
Wilton's 101 cookie cutter set (sold on Amazon.com & at Walmart)
Bendable Wire, barbecue skewers or toothpics
 RSS Feed